
By “optimise”, we are including:
- renaming the image title for search engine friendliness (to help with your overall online visibility)
- resizing (shrinking) the image to a web-friendly size (to keep your page load speed fast)
- giving the image a descriptive and keyword-rich alt text
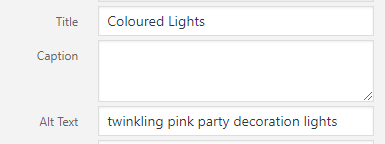
Image Title
Rename your image file to a helpful and accurate name. Keep it short but descriptive. Use any target keywords for the page to which it will be uploaded, if possible. Search engines will read the image titles of images on your page.
Image Size
Firstly, determine the size that your image needs to be.
Generally, the following size guidelines will serve you well:
A) Your website has a page margin (space at the sides), and spaces between the columns
Image to fill:
Full width of screen: 1080px wide
3/4 width of screen: 810px wide
2/3 width of screen: 720px wide
1/2 width of screen: 540px wide
1/3 width of screen: 360px wide
1/4 width of screen: 270px wide
B) Your website content fills the screen edge-to-edge (no space around images at the sides of the screen, or between columns)
Image to fill:
Full width of screen: 1920px wide
3/4 width of screen: 1440px wide
2/3 width of screen: 1280px wide
1/2 width of screen: 960px wide
1/3 width of screen: 640px wide
1/4 width of screen: 480px wide
Resize and Crop
Once you have determined the size your image/s should be, you can use a simple online tool to resize (and crop to a particular ratio, if needed). Here are a couple of online tools for this:
bulkresizephotos.com – with this tool, you can upload single files, or multiple files at once, if they are to be resized the same as one another.
imageresize.org – with this tool, you can upload single files to resize AND crop to a particular aspect ratio.
bulkresizephotos.com
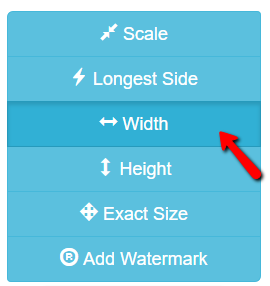
After uploading your image/s, use the options to choose how you wish to resize (e.g. by width, height, etc.).
And start resizing!
imageresize.org
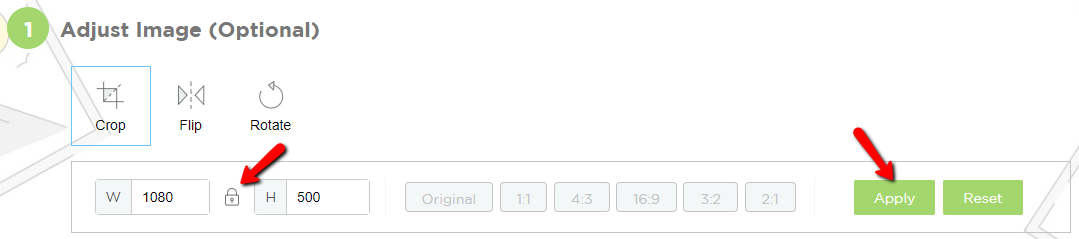
After uploading an image to resize/crop, you can select the option to crop, if desired. Be sure to lock the aspect ratio once you set it, so that when you drag the selector across your image, the ratio will stay locked. Then click “Apply” when satisfied.
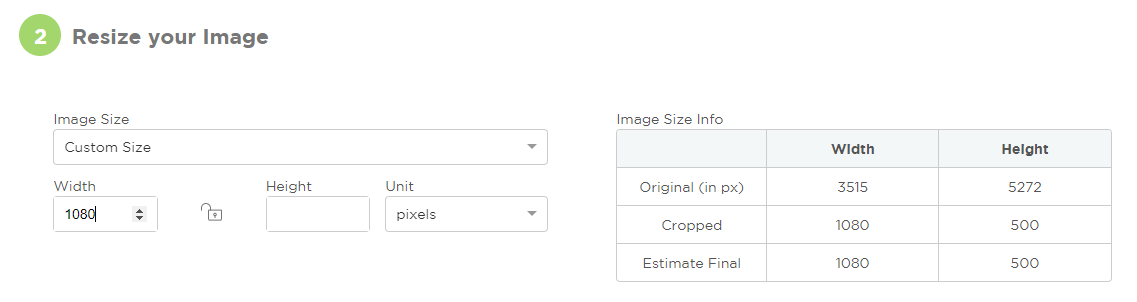
If you crop, your image may not yet be at the desired size. If it is still too big, use step 2 to resize. With the “Custom Size” option, you can set your width or height, and see the change in the “Estimate Final” on the table.
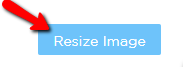
Then get resizing!
After the image has been resized, click “Save to Disk” from the options to download.

Image Alt Text
Now you’re ready to upload your renamed and resized images to the media library of your website.
Once you’ve done this, be sure to add an alt text to each image. (You can do this from the WordPress Media Library. When you click on the image, you can see the “Alt Text” field.) Search engines read the alt text of an image, if it is visible in the page’s code. The alt text can be more descriptive than the title. Write it like you are describing the image to someone who cannot see the image. And be sure to include target keywords where possible.
Your website aesthetics, page load speed and search engine visibility thank you for optimising your images by making them appropriately sized, titled and giving them good alt texts!