How to add a saved section to a page from your Divi Page Builder Library
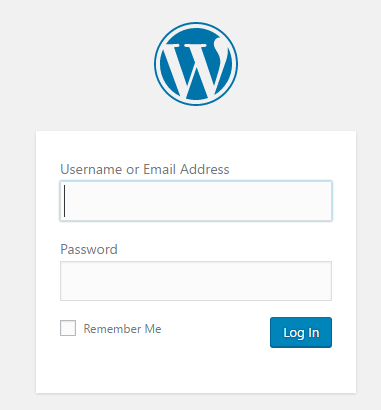
STEP 1:
Log in to your WP Admin panel.
yourdomainname/wp-admin
STEP 2:
Navigate to “Pages”.

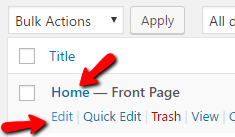

STEP 3:
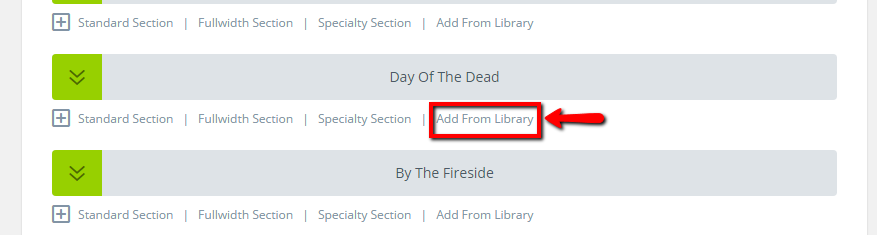
In the Page Builder, scroll to where you wish to add a new section from the library.
Click “Add From Library”.
STEP 4:
Choose the layout you wish to load.
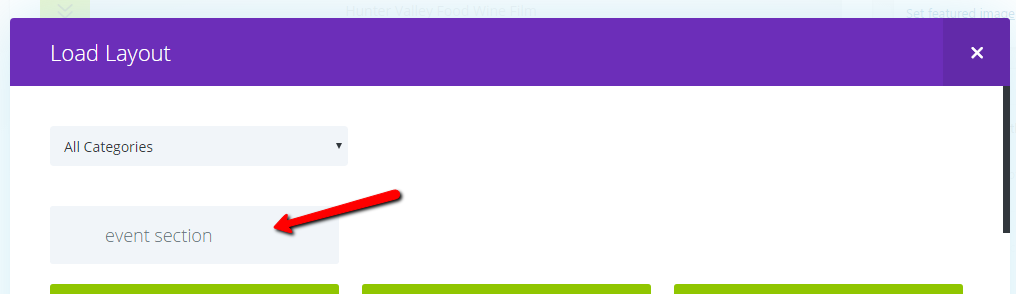
Green layouts are global, so changes you make to this will be implemented in every occurrence of this section on the website.
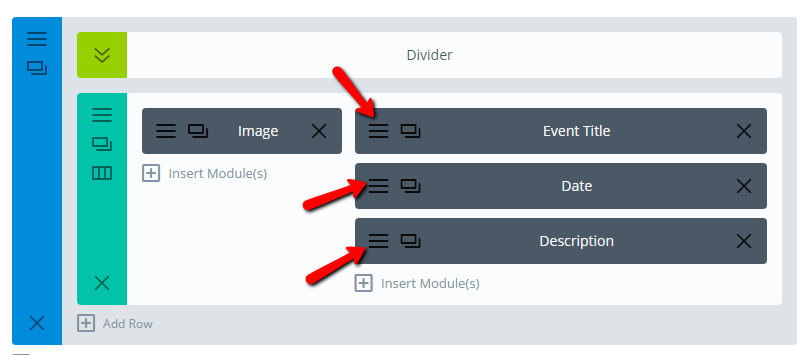
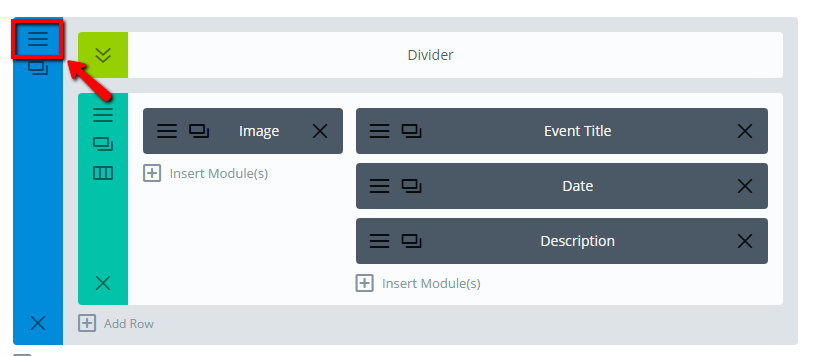
STEP 5:
Make your desired edits to the modules (or rows) in the section, by clicking on the settings icons (3 lines).
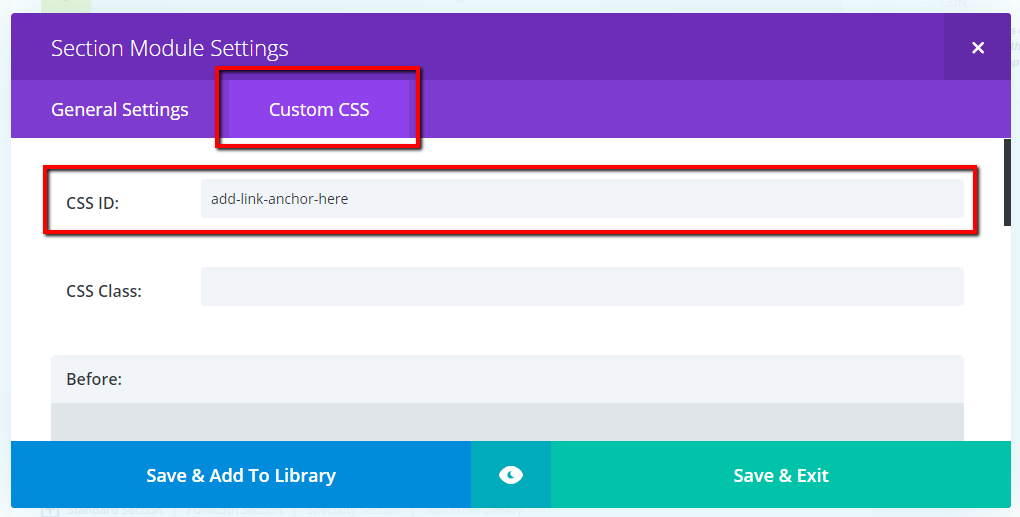
STEP 6:
Edit the section settings to give the section a link anchor, a unique name, to save it to your layout library, etc.
Add link anchor to section:
Click on the “Custom CSS” tab, and enter your desired link anchor.
You can link to this anchor with the matching link:
#add-link-anchor-here
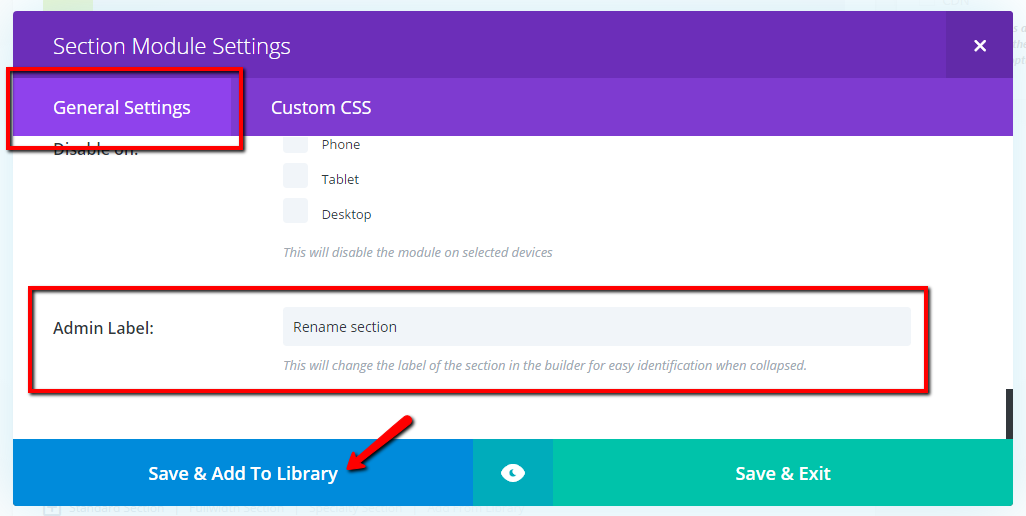
Give the section a unique admin label:
Click on the “General Settings” tab, and scroll down to “Admin Label:”.
You can give your section a unique label, which will be visible if you collapse the section.
Click “Save” OR “Save & Add To Library” if you wish to use this section again in other places on your site.
Save to layout library:
Give the layout template a name.
You can also choose to make it a global section (which means changes made to this layout anywhere on the site will update every occurrence of this layout on the site).
You can choose or add a category for your layout for helpful organisation.
When you are finished, click “Save And Add To Library”.
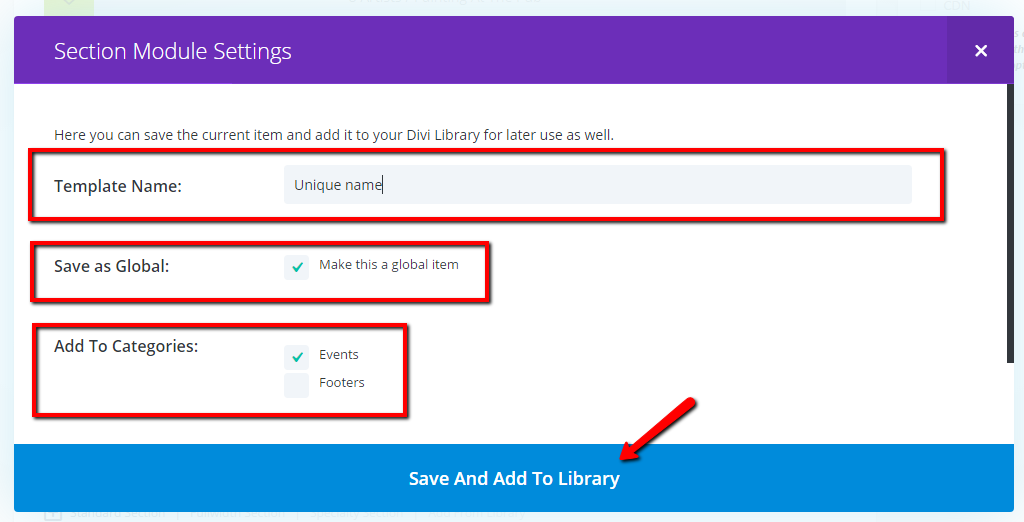
Now you will also be able to add this section to other places on your site.
Changes to this section can be made from the page, or from your layout library (navigate to Divi>Divi Library from the admin menu).
You can collapse this section by right-clicking on the settings icon, then clicking collapse.
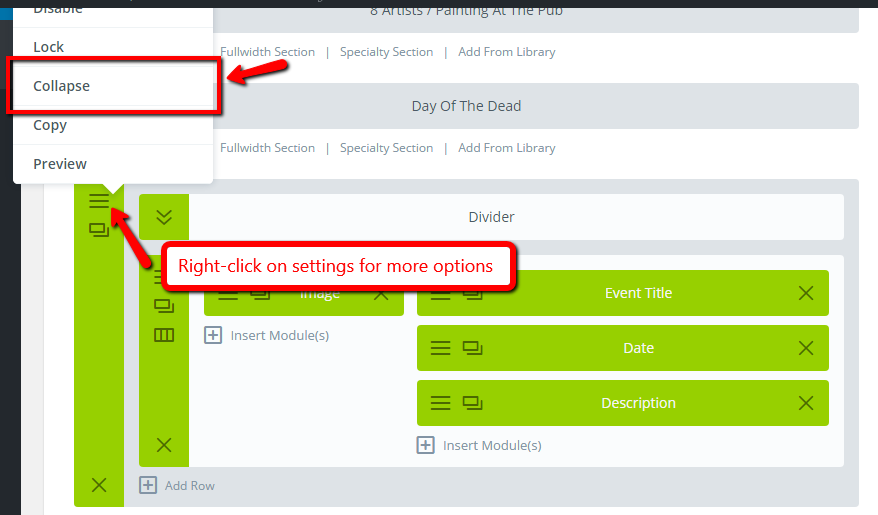
Your collapsed section will now look like this, with the section admin label visible for reference:

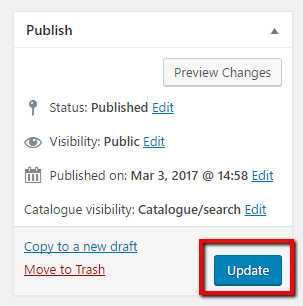
STEP 7:
Finally, save your changes.