Summary:
- Step 1 – login
- Step 2 – navigate to WooCommerce order list
- Step 3 – view/update order status and process payment if necessary
- Step 4 – view details and fulfill order
- Step 5 – complete order and update status
- Step 6 – send shipping notification
STEP 1:
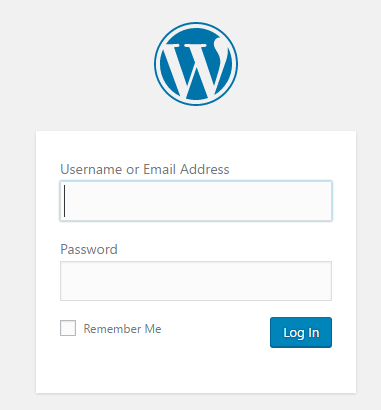
Log in to your WP Admin panel.
yourdomainname/admin
STEP 2:
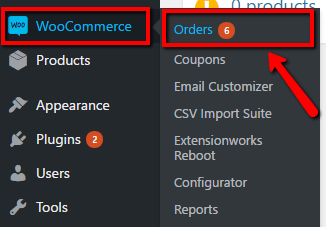
Navigate to “WooCommerce”>”Orders”.
STEP 3:
New orders will have a “Processing” status or “On hold” status.
Hover over the status to see more info.
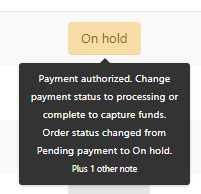
If the order status is “Processing”, payment has been processed and the order is awaiting fulfillment.

If the order status is “On hold”, the order is awaiting payment (such as through a PayPal capture, if the shop is set to authorize only; or bank transfer if enabled as a method; or a payment issue that needs manual checking if payment should be automatic).

If the order has been paid, the status can be changed to “Processing” and the order is ready to be fulfilled.
OR
If using PayPal authorize method, change the status to “Processing” to capture the funds.
There are several ways to change an “On hold” status to “Processing”:
1. From preview:
Click on the eye icon to preview the order.
![]()
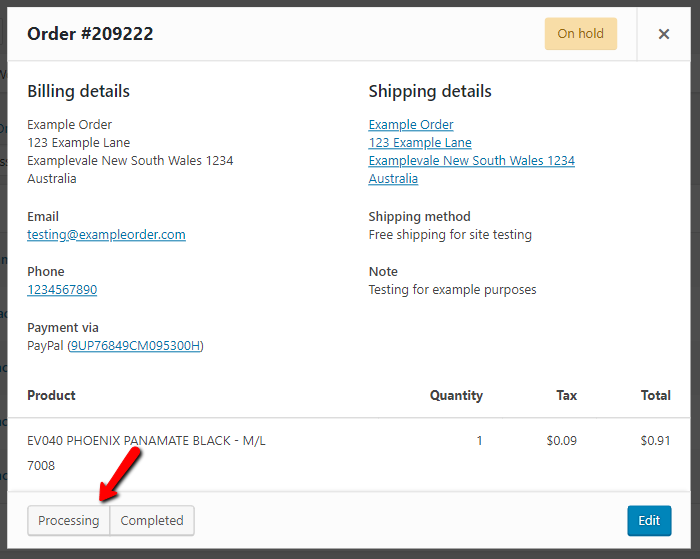
Then in the preview, click on the “Processing” status to update.
2. With bulk edit function:
Tick the checkbox of the order/s you wish to update.

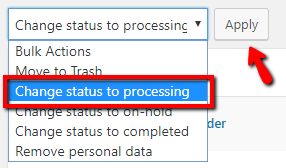
Then select “Change status to processing” from the drop-down menu and click “Apply”.
3. From within the order details:
Click on the order or the status to view details.

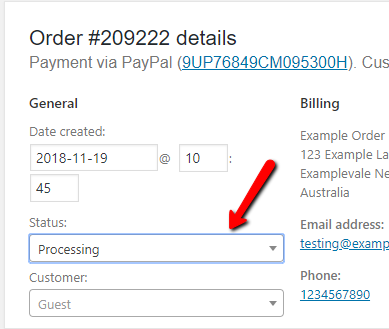
Then from withing the order details, change status to “Processing” from the drop-down menu.
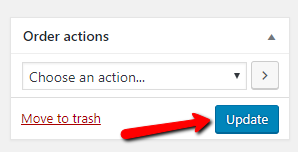
Then in the “Order actions” box, click “Update”.
Now the order will display the “Processing” status.

STEP 4:
To view the order details, click on the order or status.

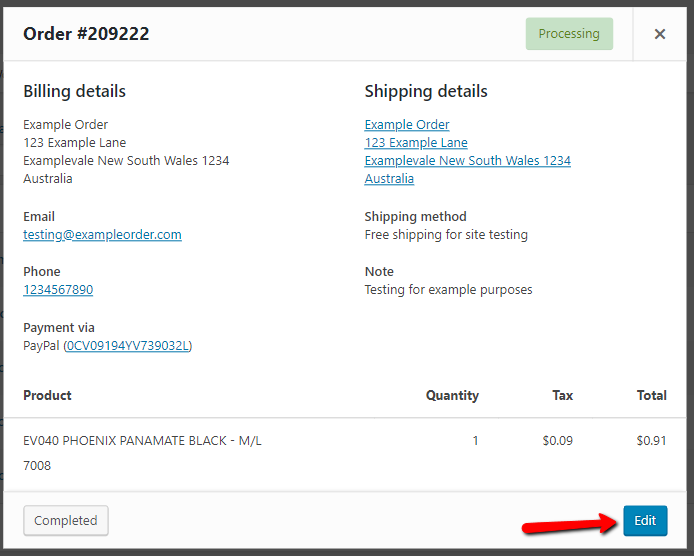
OR you can click on the eye icon to preview, then click “Edit” if required.
![]()
OR you can also view order details from your ‘new order’ notification email.
You can now see the order details, including the customer billing address and shipping address, and any notes from the customer.
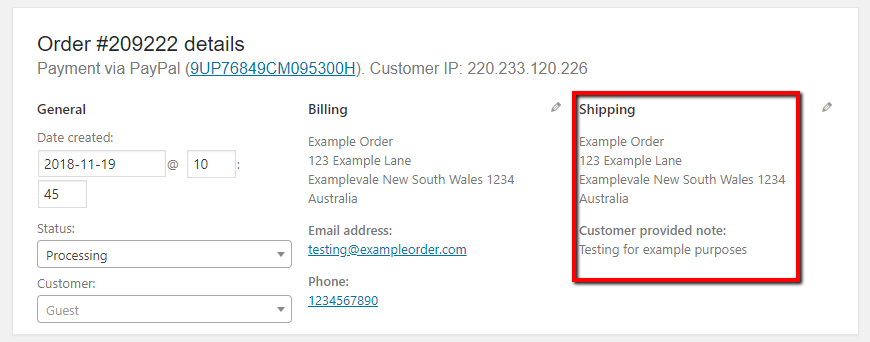
Scroll down further to the items in the order to be fulfilled and the shipping method.

Note: You can easily contact the customer with any queries by using the email or telephone links in the order details or order preview.
If your website is using the Australia Post WooCommerce Extension PRO, click here for instructions on adding tracking info before marking an order as ‘completed’.
STEP 5:
Once the order has been fulfilled and shipped, you can update the status to “completed”.
There are a few ways to do this:
1. With the completed action button.
If your version of WooCommerce has it enabled, you can click on the ‘tick’ icon button.
2. Using Bulk Actions.
Tick the checkbox/es of the applicable order/s.

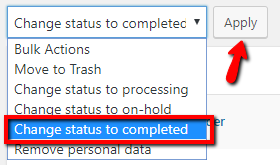
Select “Change status to completed” from the Bulk Actions drop-down menu, then click “Apply”.
3. From the order preview.
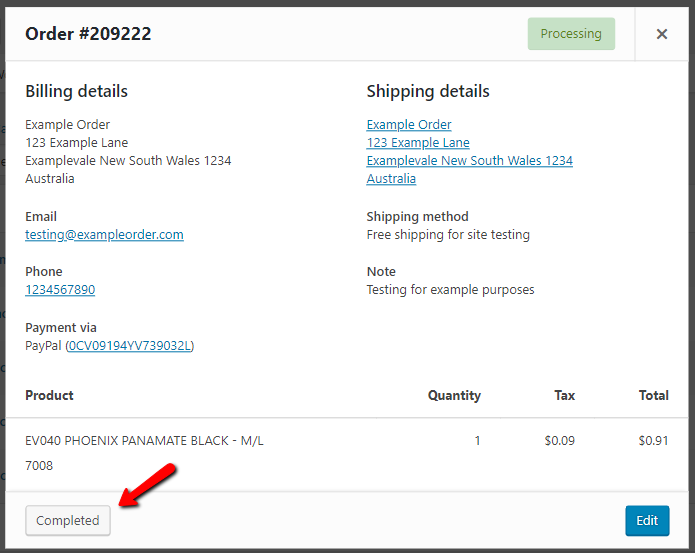
Click on the eye icon to preview order.

Click on the “Completed” status button to update.
4. From the order details. (Use this for ease if the order details are already open.)
Click on the order or status to view details.

Change status to “Completed” using the drop-down menu.
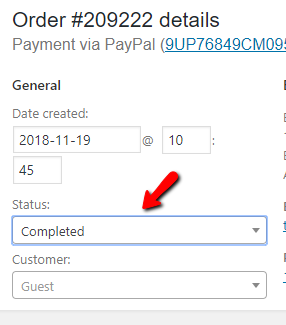
Then click “Update” in the “Order actions” box.

STEP 6:
If your website is NOT using the Australia Post WooCommerce Extension PRO, or you are shipping via a different method, there is still a simple way to send a shipping note to your customer:
To send a shipping notification with a tracking number, view your order details (using method detailed above) and add a note.
In the “Order notes” box (bottom right), type/paste in your shipping message with the tracking number, select “Note to customer” and click “Add”.
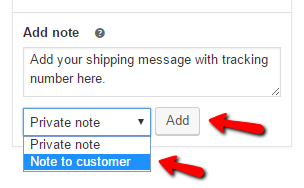
A ‘note to customer’ will automatically email the customer with the added note (in this case, a shipping note).
To avoid lots of manual typing, keep a message template saved somewhere from which you can copy and paste in here.
And if possible, copy and paste tracking number from your wherever the tracking numbers are stored (e.g. in e-Parcel account).
NOTE ON REFUNDS:
For instructions on processing refunds, see: